This page will teach you about all the Scratch Blocks available for the Circuit Playground board. If you haven’t already, you’ll want to look at our getting started guide to get set up.
You can find the Circuit Playground blocks under the More Blocks tab. Most of the following examples use a sprite, which is a Scratch character. You can add a sprite to your project by clicking one of the New sprite options near the middle of the screen.
Contents
Capacitive Touch Sensor
Detect input from anything conductive with just 1 alligator clip wire. You can use a piece of fruit (or yourself) as a button!

To use this block first clip an alligator clip into something conductive like fruit, then clip the other end of the alligator clip into corresponding pin on the Circuit Playground. The default pin is #0, so in that case clip onto the pin labeled “RX #0″ on the Circuit Playground. You can also tap the end of the clip or the Circuit Playground pin itself to activate the sensor, since you should be just as conductive as the fruit.

Plug the alligator clip into pin #0 to use Touch sensor 0
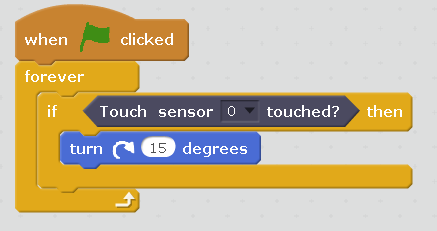
Here’s a quick example which will spin your sprite around when the touch sensor is triggered:
Neopixel RGB LEDs
You can light up the 10 independently controlled LEDs on the Circuit Playground any color you want, or even light up all 40 on the Neopixel Shield! To light up an LED, simply click on one of these blocks in Scratch. First up is the block you’ll need to control the 10 Neopixels on the Circuit Playground:

If you want to use the Neopixel Shield, you’ll need to connect 3 alligator clips between it and the Circuit Playground as shown in the picture below:

Connect #6 to #6, GND to GND, and finally 3.3V to 3.3V.
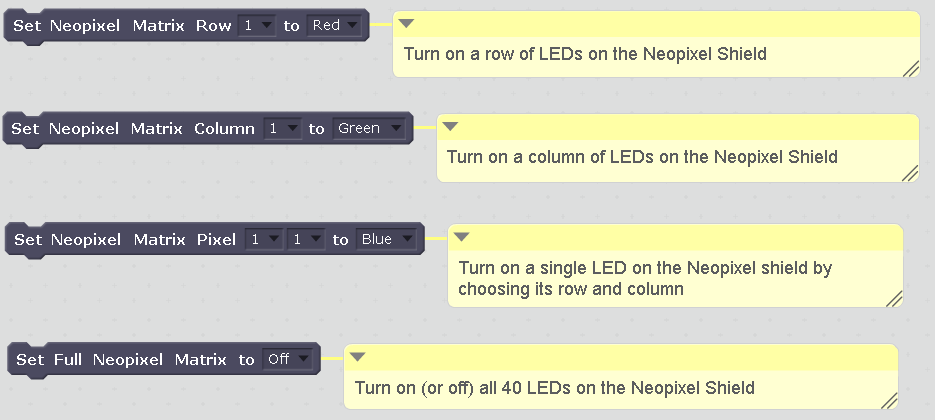
Next up are the blocks for controlling the Neopixel Shield:
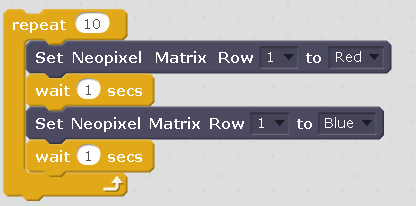
Here’s an example of a repeating animation:
All you need to do is click on one of these blocks to activate them. You’ll see them light up when activated.
Light Sensor
The Light Sensor is a phototransistor designed to measure the illuminance of the visible spectrum of light that humans see. The Scratch block will output a number between 0 and 255 to indicate how bright the light is.

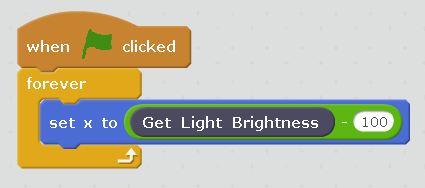
Here’s a quick example which will move your sprite back and forth depending on the light level. You can move your hand up and down above the board, or move a flashlight up and down for better results.
Microphone
The Microphone Scratch block will output a number between 0 and 255 corresponding to the sound level hitting the microphone.

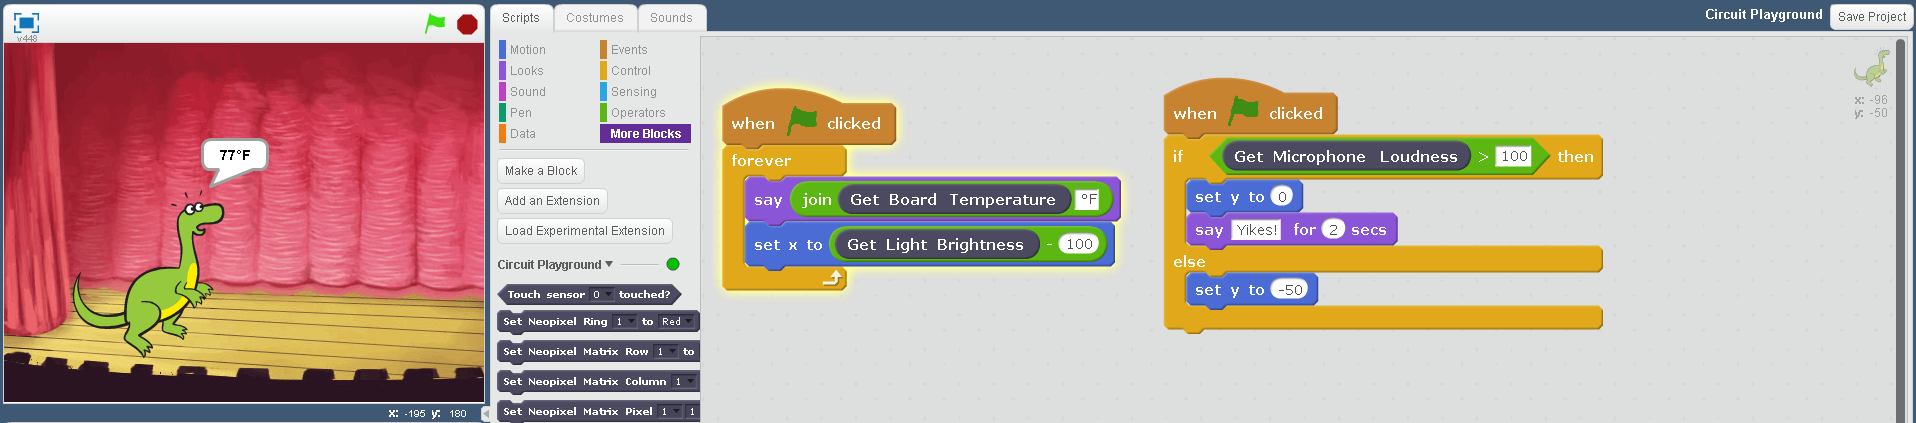
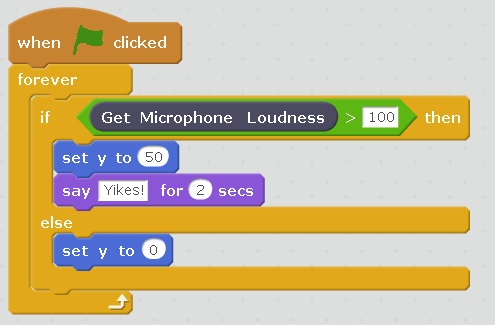
This example will have your sprite jump up and say “Yikes!” if the sound level passes a threshold of value 100. Tap the microphone or shout at it to pass the threshold. You might have to change the 100 value depending on the ambient level of noise in the room.
Temperature Sensor
The Temperature Sensor is a thermistor that allows us to get the temperature of the board. The math has already been done to convert its analog value output into degrees Fahrenheit or Celcuis.

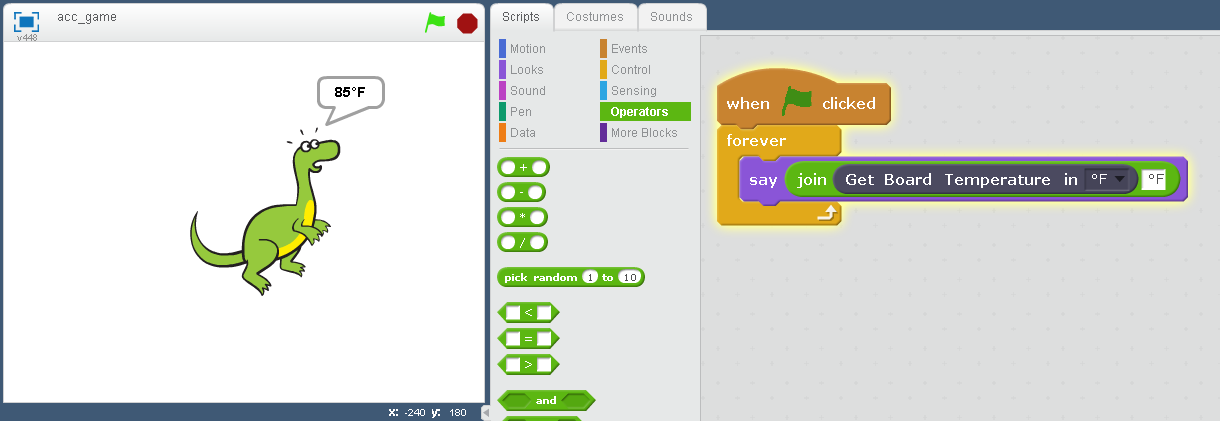
This example will have your sprite display the board temperature in degrees Fahrenheit.
Push Buttons
This block will detect when you press one of the push buttons. You can use it just as you would the touch sensor block.

Slide Switch
This block will detect what position the slide switch is in.

Accelerometer
This sensor allows you to detect the orientation of the Circuit Playground board, or rapid movement. This is reported as a number from 0 to 255. The accelerometer chip is right in the center of the board, and there you’ll also find arrows pointing in the direction of each axis.

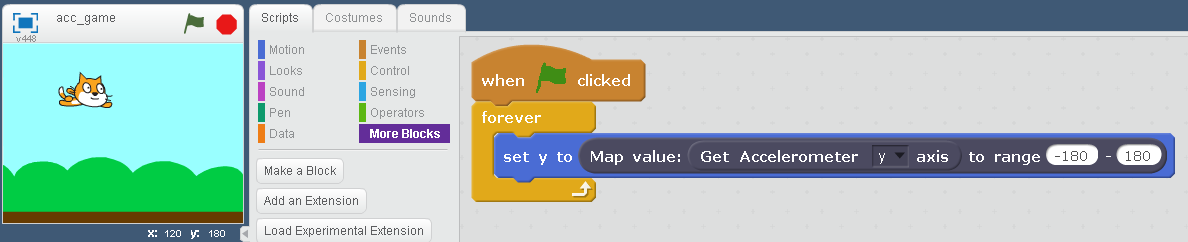
In this example we use the Accelerometer y axis to fly our Cat up and down when you tilt the Circuit Playground. This could be the beginnings of making your own video game controller, and video game for that matter! We use the “Map value” block to map our 0 to 255 number into Scratch screen coordinates. In Scratch, the x screen coordinates go from -240 to 240, and y goes from -180 to 180.
Map Value
This block is a math helper function. It takes a given value in the range 0 to 255 and then maps it into a new range of numbers. This is particularly useful for mapping a Circuit Playground sensor reading to Scratch screen coordinates.

See the accelerometer example above for a good use of this block.
Advanced Blocks
This is a separate advanced extension that will let you take your Scratch programming to the next level. It includes Neopixel blocks that support variables for fancier animations. It will also support the ability to tile multiple Neopixel Matrices together, which I will explain how to do in a future project post. You can launch this advanced extension from the Scratch connection app by choosing the “Advanced Scratch Extension” option.
Neopixels
Here’s what our new advanced Neopixel ring block looks like:
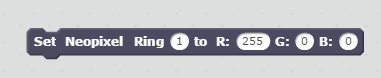
You can use a number of 1-10 for the Neopixels on the Circuit Playground. For the colors RGB (Red, Green, Blue), you can put in a number from 0-255. You can also use variables (Data-> Make a Variable) so that you can use loops to quickly cycle through Neopixels and their colors. See the example below:
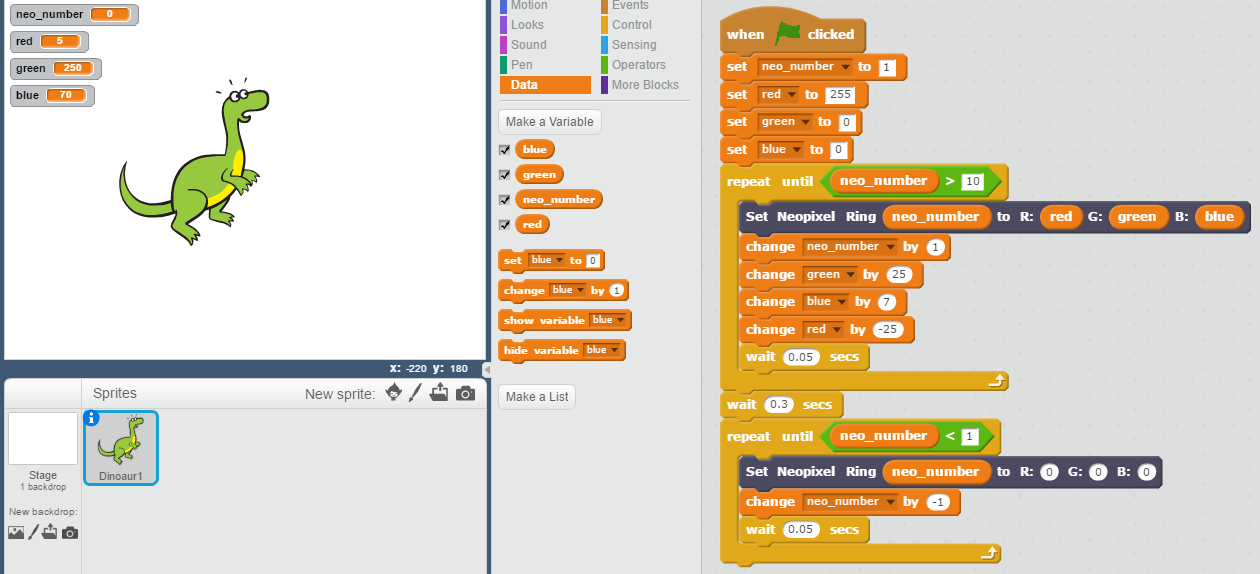
This example will quickly turn on each Neopixel on the Circuit Playground with a different color, then turn them off. Each of the Neomatrix blocks have been updated as well.

Matrix Row takes 1-8 for the row, Matrix Column takes 1-5 for the Column, and Matrix Pixel takes 1-8,1-5 for its row and column.
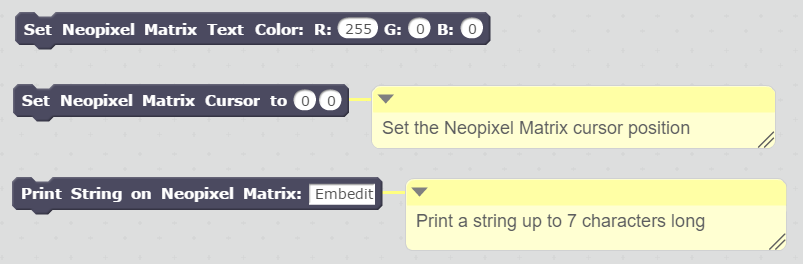
Neopixel Scrolling Text
Requires Circuit Playground firmware 1.5 or above. With these blocks you’ll be able to scroll text across the Neopixel Matrix. You can print a string of text up to 7 characters long.
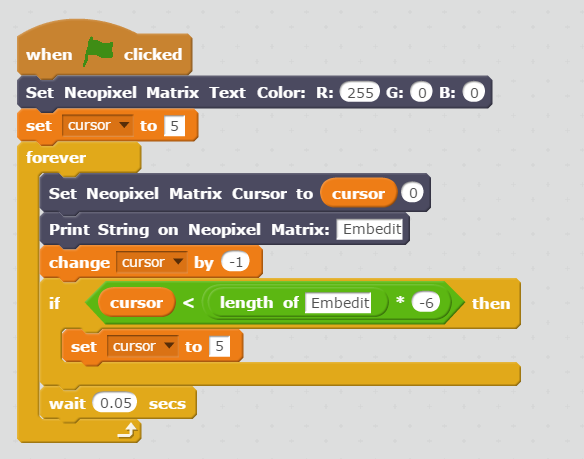
The example below will show you how to use these blocks to scroll text across the Matrix, and is also included in the default advanced extension project. The cursor location decides what part of the string of text to display. We create a variable (Data blocks tab) called “cursor” and change it by -1 each time we go through the loop. We move the cursor backwards in order to move the first letter of the string across the screen first. The “if” statement sets the cursor back to the beginning once the cursor has advanced far enough to scroll past the string.
Troubleshooting
If you find your Scratch input blocks unresponsive (touch, light, sound, etc.) try the following:
- The Scratch Connection App might be minimized. Click on the app in the taskbar to bring it back into focus. You can then click on your Chrome window again to go back to Scratch.
Click on the Embedit Icon to bring focus back to the app
- On OS X you’ll need to make sure the Scratch Connection App is visible on your screen or the Scratch blocks might slow down.
- Check that the Scratch Connection app shows the Circuit Playground as connected.
- If all else fails, try hitting the RESET button in the middle of the Circuit Playground board, and then restart the Scratch connection app.
Ilvia Chacón
January 13, 2018 at 8:56 pm
Hello. I’m a teacher and is the first time that I use circuit playground. I have a project and need to conect more than four touch sensors. Can you tell me if this is possible? Thank you very much.