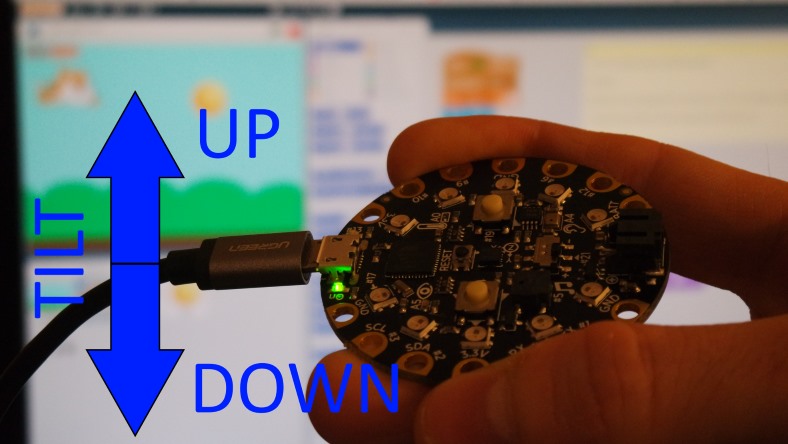
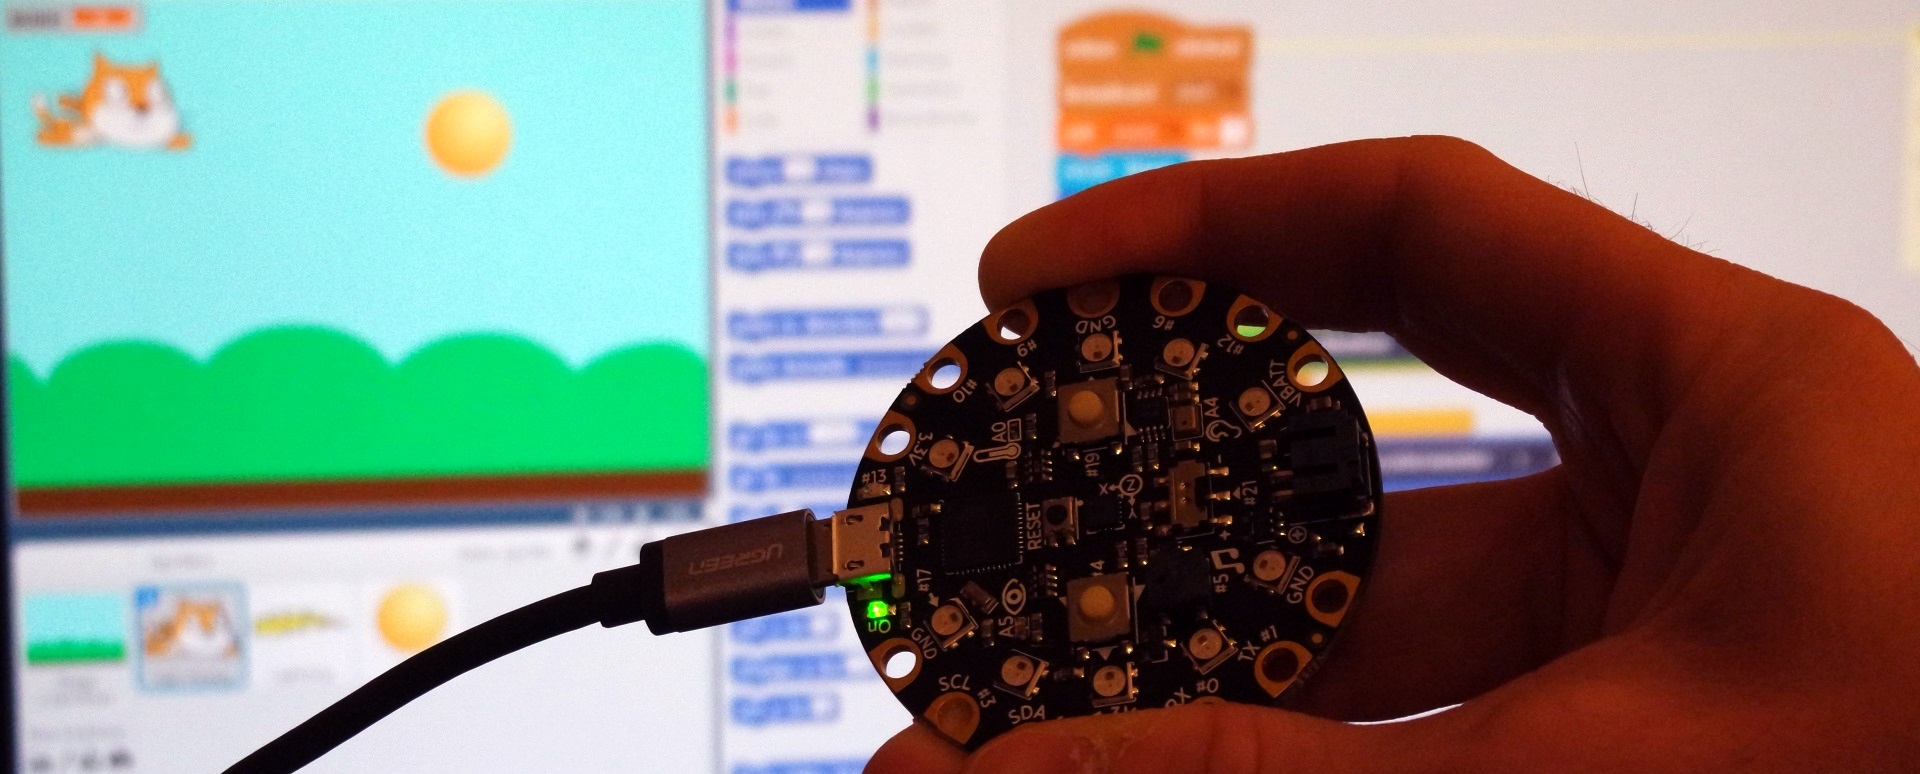
And your own game too! In this project I’ve created a basic video game. You move the cat up and down to shoot at randomly placed targets, trying to hit as many as possible. Moving the cat is done by tilting the Circuit playground board towards and away from you. This is accomplished by using the accelerometer on the Circuit Playground, which senses the movement of the board in 3 axes.
Usage
Make sure you’ve followed the set up instructions for your Circuit Playground. You can launch the game by selecting “Accelerometer Game” in the Embedit Scratch Connection App.
You’ll want to hold the Circuit Playground like in the video above. The USB cable should be on the left or your controls will be inverse. Tilt the front of the Circuit Playground towards you to fly down, and tilt it away from you to fly up. Press and release the bottom push button to shoot a lightning bolt.

The Code
Here I’ll explain how the code works and make some suggestions for adding features to the game. There are three sprites (Cat, Lightning, Ball) placed on the stage, each with their own code. First up is the Cat:

Code for the Cat sprite
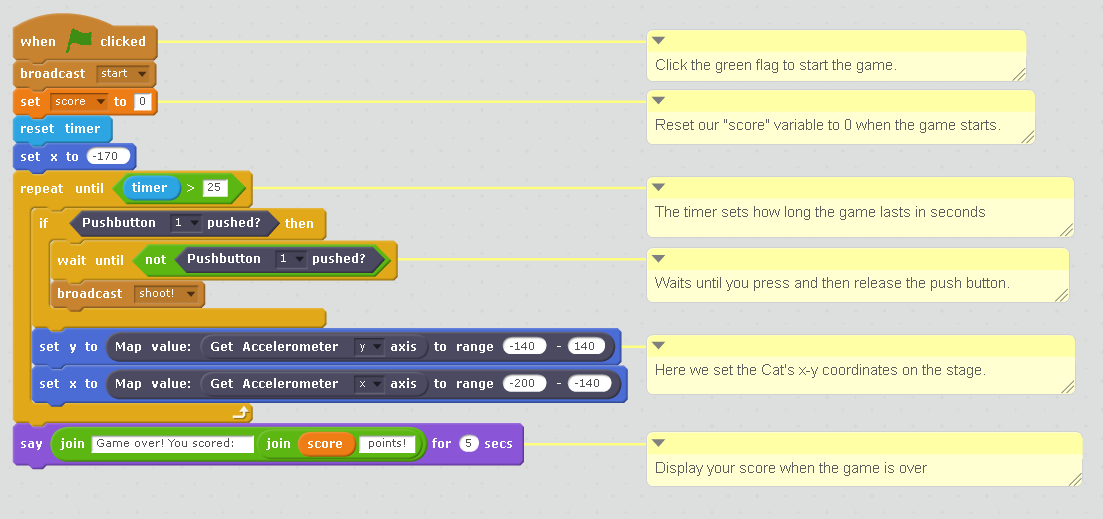
The code runs top to bottom when the green flag is clicked. The blocks inside the “repeat until (timer>25)” block run to the bottom of that block and then back to the top of it until the condition is met. The comments explain most of the code but there are a few more things I should point out.
The “if” block checks if the push button has been pressed. If so it then runs the “wait until” block which waits until the push button is released. This makes sure only one lightning bolt shoots out per button press. After the push button is released, the “broadcast” block runs and sends out a message called shoot! Other sprites can detect when this message is sent, which we will make use of later on.

The “set y to” and “set x to” blocks set the x-y coordinates of the Cat sprite on the stage. What we are doing here is using the inputs from the accelerometer axes to set the Cat’s x-y coordinates. Some of the Circuit Playground sensors (light, sound, accelerometer) give you an analog value when you use their block. This analog value is a number in the range of 0 to 255. This is in contrast to a digital value, such as what you get from the push button or touch sensor blocks, which just report on or off.
Unfortunately using the numbers 0 to 255 don’t map so well to Scratch x-y coordinates. In Scratch, the x coordinates go from -240 to 240, and y coordinates go from -180 to 180. This is where the “Map value” block comes in. It takes in a number in the range from 0 to 255 and maps it to a range of your choosing. I’ve used the Map value block to allow the Cat to fly most of the way up in down and move just a little bit back and forth.

Code for the Lightning sprite
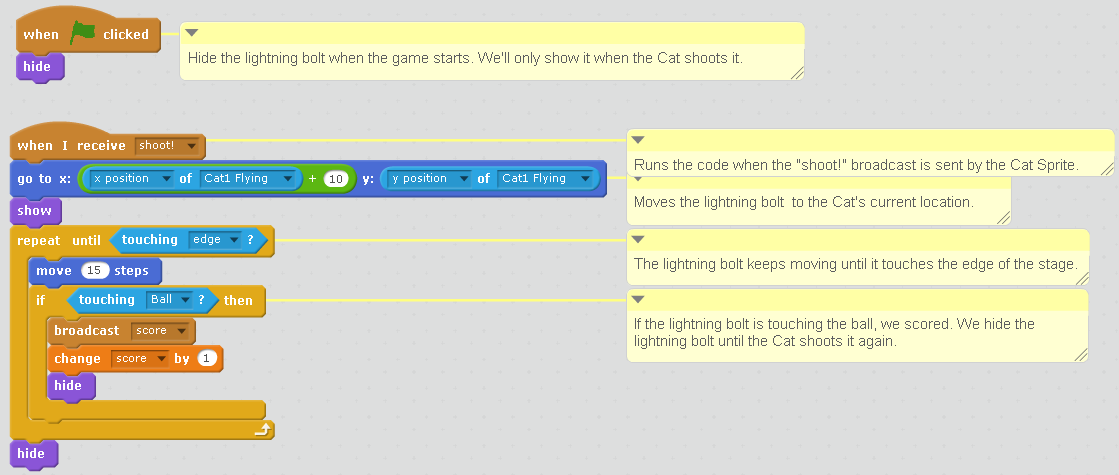
In the Lightning sprite we make use of the shoot! message sent out by the Cat sprite. The “when I receive” block receives the message and then runs the code under it. The lightning bolt moves to the right until it hits the edge of the stage or the target. If it hits the target, the Ball sprite, then it sends out a broadcast with the message score, which will be used by the Ball sprite later on. Finally it increments the score variable (not related to the score message) by 1. This variable stores the current score and displays it on the stage.

Code for the Ball sprite
The ball sprite waits until it receives the score message. When it does, it briefly changes color to signify it has been hit, and then goes to a new random location on the stage.
Going Further
There are a lot of different things you could do to spice up the game. Here’s a few suggestions:
- Add sound effects for shooting and scoring
- Shoot by tapping a banana instead of the push button
- Light up LEDs on the Circuit Playground when you shoot, or to represent your score
- Change what the target looks like every time you score
- Add a second player that uses the keyboard to move


