Here’s an overview of each of our Scratch blocks for the PiSoC. If you haven’t already, you’ll want to look at our main Scratch Documentation page to get your Scratch environment set up. For the best experience you’ll want our PiSoC Inventor’s Kit, but we also provide links for buying each part separately from other vendors.
You can find the PiSoC blocks under the More Blocks tab.
Contents
Capacitive Touch Sensor
Detect input from anything conductive with just 1 wire. You can use a piece of fruit (or yourself) as a button!

To use this block you’ll need to plug something conductive into Port 4 (touch sensor 1 starts at Port 4, Pin 0) of the PiSoC. Fruit is generally everyone’s favorite. Use a male to male wire (the pointy kind), and plug one end into Port 4 of the PiSoC, and then push the other end into the fruit. You can also tap the end of the wire to activate the sensor, since you should be just as conductive as the fruit.
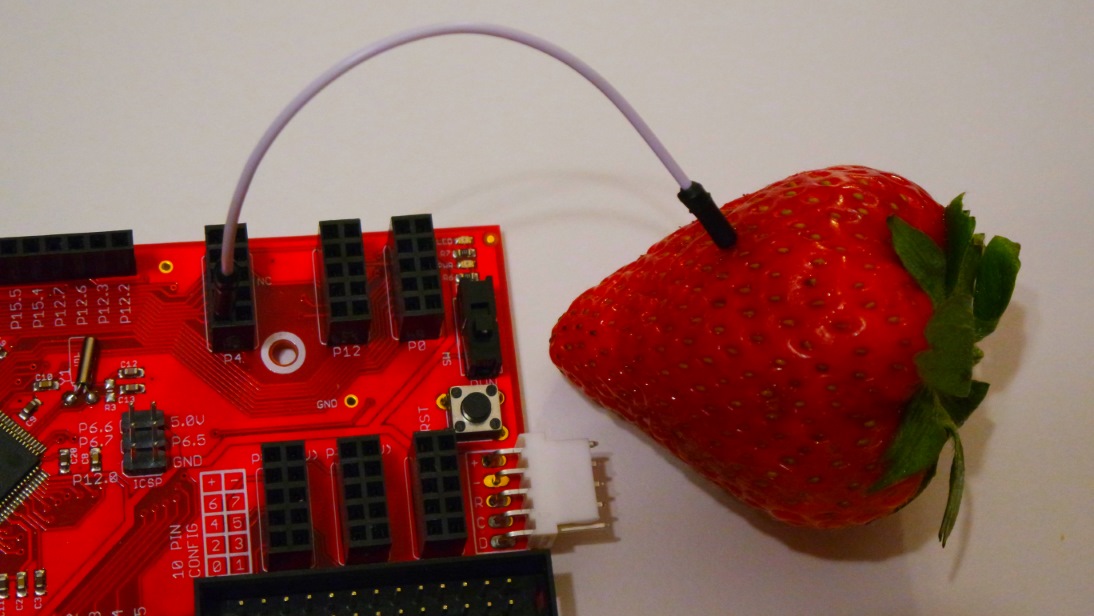
While I wouldn’t recommend it, I did eat it afterwards.
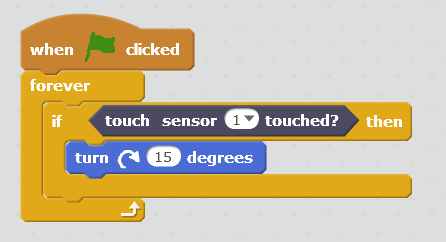
Here’s a quick example which will spin your sprite around when the touch sensor is triggered:
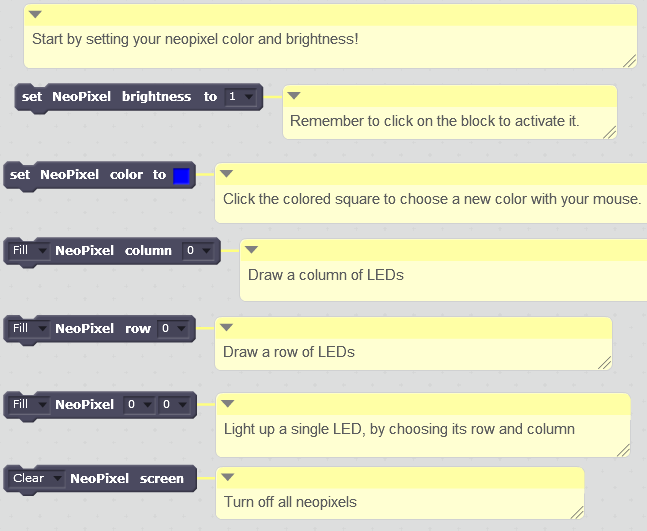
Neopixel RGB LEDs
Light up 40 independently controlled LEDs any color you want!
For these blocks you’ll need to use the Rainbow LED shield included in our Inventor’s Kit or purchase a compatible shield from Adafruit (Warning – the headers need to be soldered on) or Aliexpress (Board came fully assembled for me).
*You should plug the shield into the PiSoC before powering up the PiSoC or you might have to reconnect*

Plugging in the Neopixel shield. Note how the pins on the end line up.
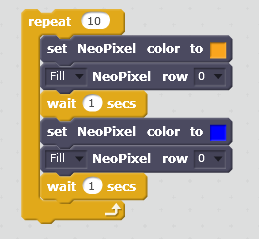
Here’s an example of a repeating animation:
Joystick Shield and Analog
You can use a joystick as a form of analog input for precise control.
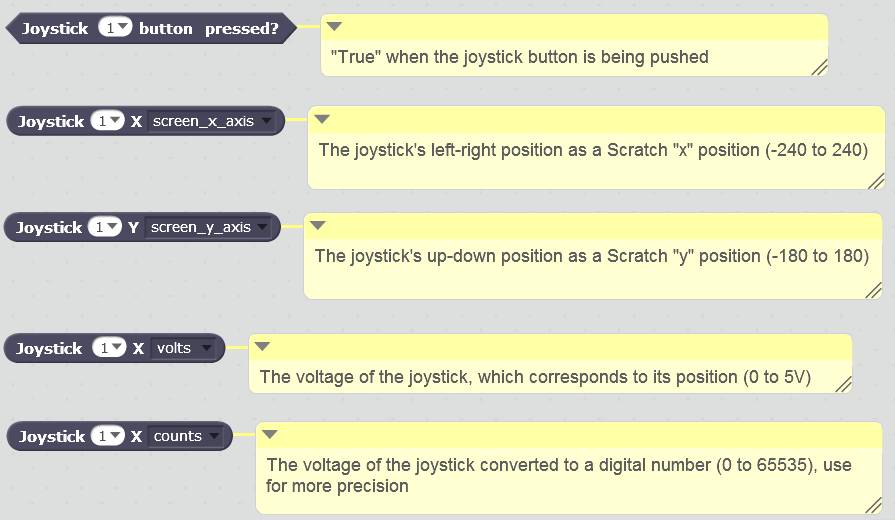
You can use the Joystick shield in our Inventor’s kit or pick one out online. Most “Arduino joystick shields” that look similar should work. With the joystick you can move your sprites faster depending on how far you push the stick. Also, by default the joystick button is the bottom big button on the shield. In the advanced section at the bottom we will show you how to turn any pin into an input button (or you could use touch sensors to add more buttons).
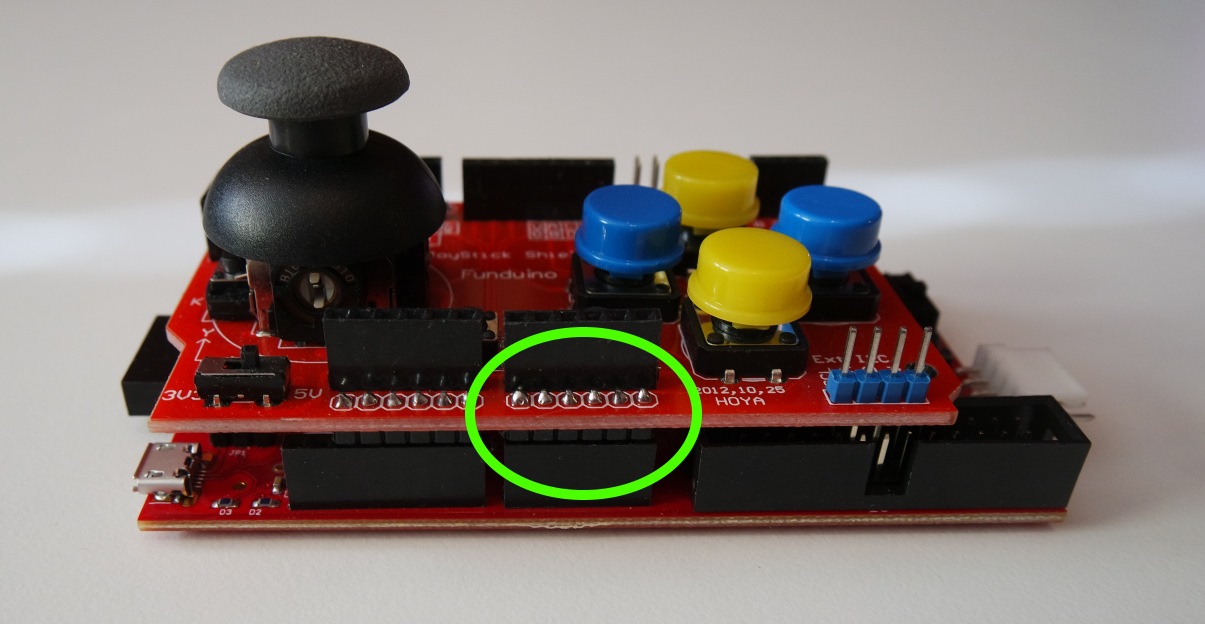
Plugging in the Joystick Shield. Note how the highlighted pins line up.
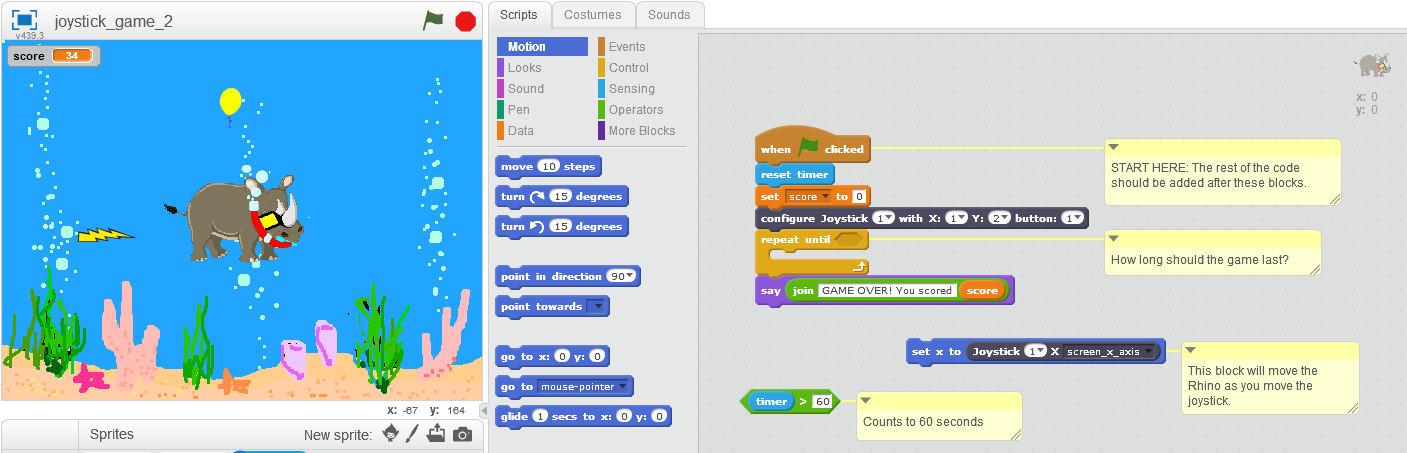
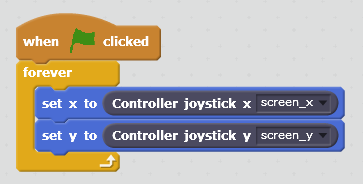
This example will move your sprite across the screen as you move the joystick. Can you think of a way to add momentum so your sprite moves more like a video game character?
Servo Motors
These motors will move back and forth, or hold position at your command. What can you build with them?
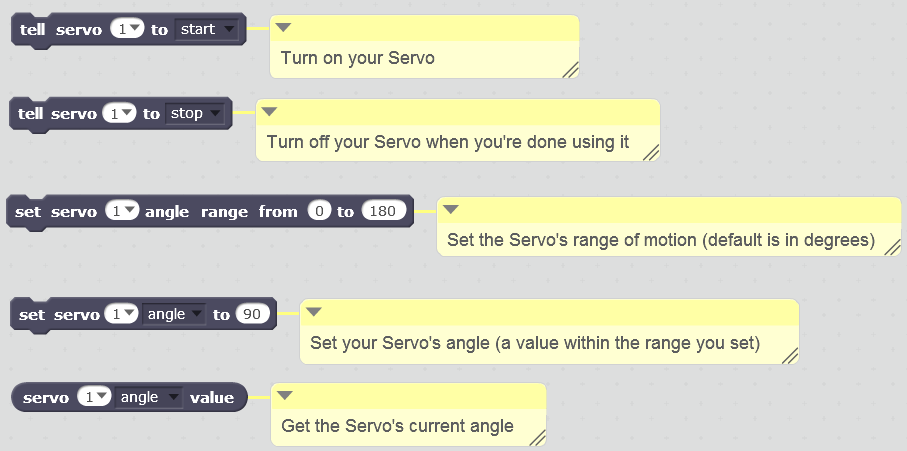
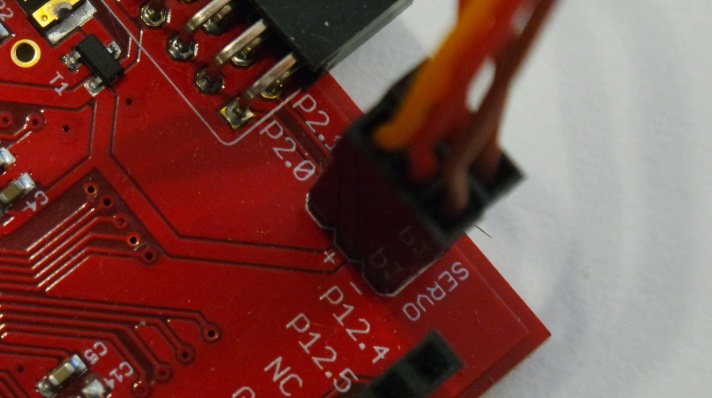
First, plug your servos into the PiSoC servo header. The Pan servo goes into P2.0, and the Tilt servo goes into P2.1. The brown wire coming from the servo goes into the pin labeled –.
With these commands you can move the servos however you want in a 180 degree arc. The example below will show you how to use your joystick to control a servo:
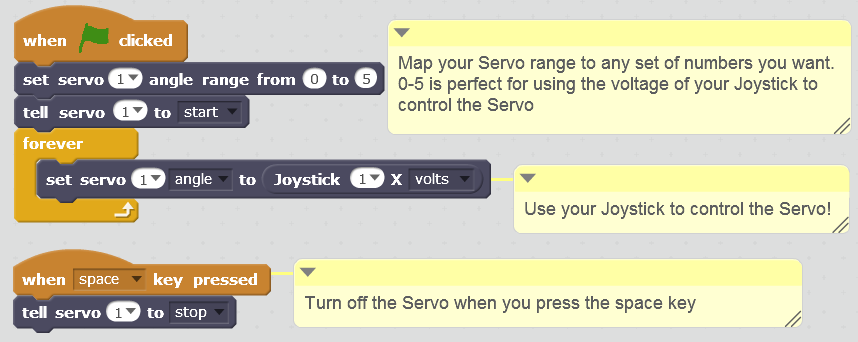
How can you adapt this code to use the joystick to control both servos?
We use micro SG90 servos but any should work. Be aware that the PiSoC can only provide up to 500mA of sustained current, so set your servo angles conservatively within your range bounds if your servos are stalling. We will also have a tutorial on using the servos with external battery power for more flexibility. If you need help assembling the pan-tilt bracket, check out this tutorial.
Ultrasonic Range Finder
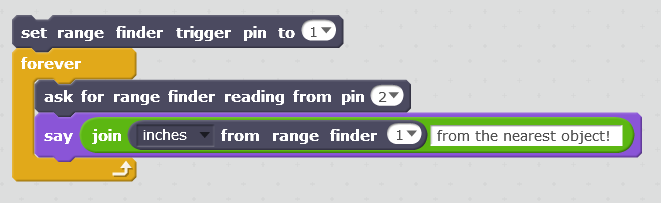
These sensors let you measure distance to the nearest object in front of them.
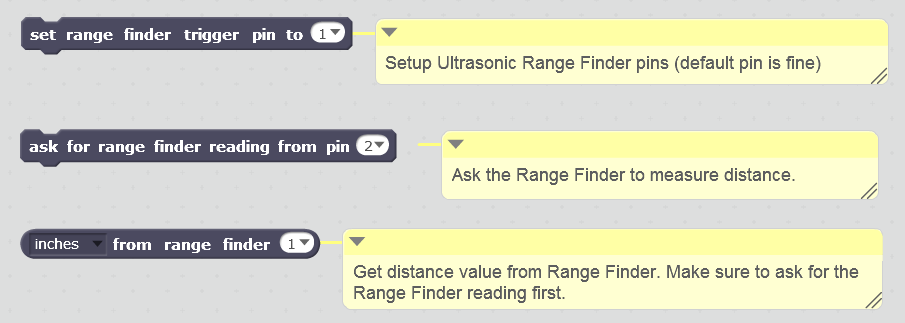
Here’s an example that gets your sprite to “say” how far the ranger is from an object: