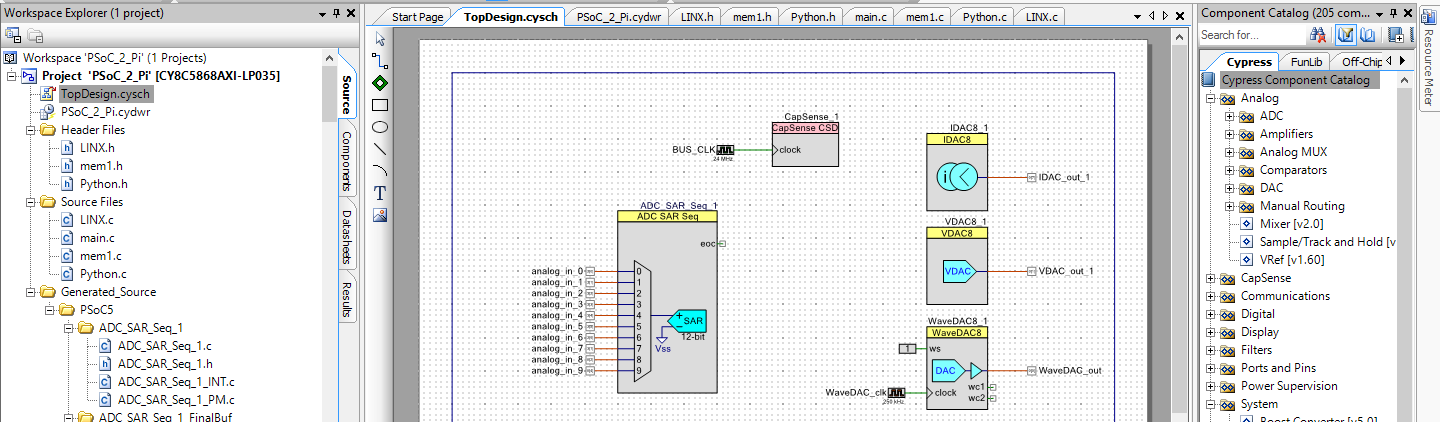
This article will go over how to program the PiSoC using PSoC Creator, with and without the miniprog. PSoC Creator is currently Windows only but will work in a VM. It gives you maximum flexibility in design, such as using any function on any pin, along with customizing your use of analog and digital logic. The PiSoC’s pre-installed Python/Scratch API is actually a PSoC Creator project that breaks out a large subset of available functionality. We will show you how to edit that project to change functionality, or how to program the PiSoC with your own new projects.
Download PSoC Creator here. You’ll need to make an account but everything is completely free.
You can download and modify our Python API project or create your own new “PSoC 5LP” project using the new project wizard in PSoC Creator. You can also use the numerous PSoC 5LP example projects included in PSoC Creator as starting points for your own projects.
Check the bottom of this page for PiSoC technical reference information.
Programming with the Miniprog
If you have a miniprog3 programmer, you don’t need to use the PiSoC bootloader and can instead program and debug your PSoC directly. When you plug your miniprog into your computer for the first time it will install drivers automatically.
*Before you use the miniprog, ensure the PiSoC is not powered by another device at the same time (USB or RPI header) *
You can remove the USB/PI power jumper near the PiSoC’s USB port if you want to keep the other devices plugged in while using the miniprog.
Once you’ve created a project, plug the PiSoC into the white header of the miniprog, and then simply press the program button in the toolbar, or press “CTRL + F5” on the keyboard.

If programming fails and the Select Debug Target window pops up, you might have to adjust some settings as detailed below.
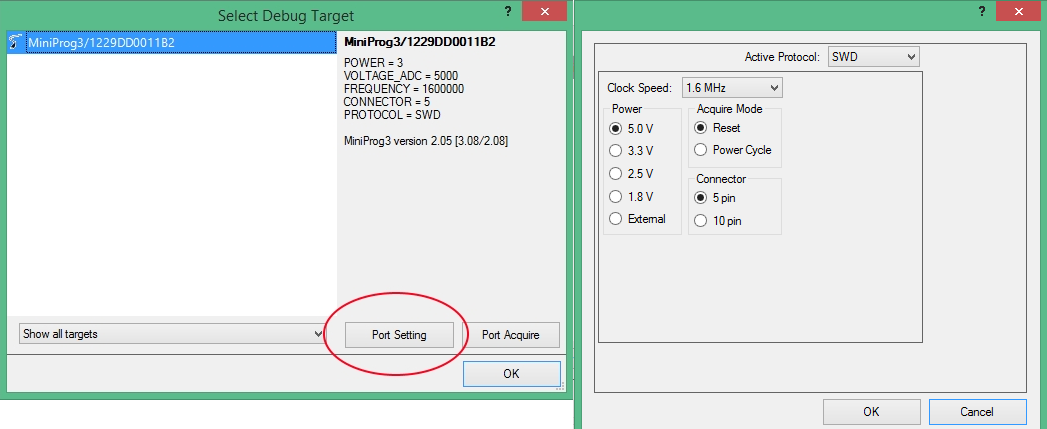
First, click “Port Setting” in the Select Debug Target window. Now set the miniprog settings as shown above. (5V Power, Reset Acquire Mode, 5 Pin Connector) Then click “OK”
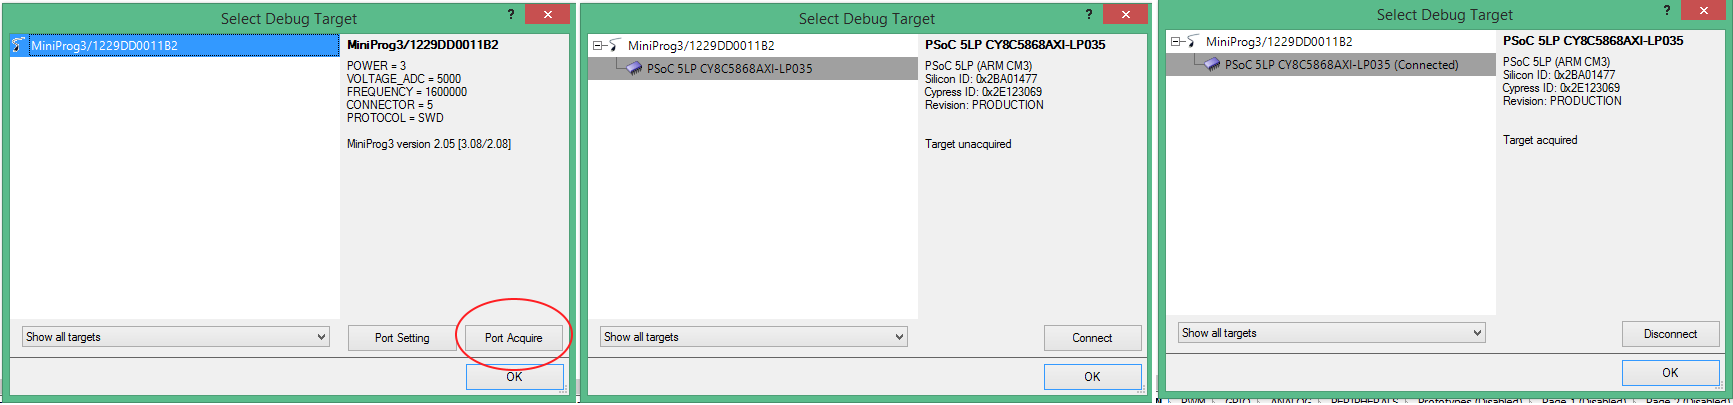
Back in the Select Debug Target window click “Port Acquire”, then “Connect” when the option pops up, and then finally click “OK” to start programming. After this you should be able to program by clicking the program button.
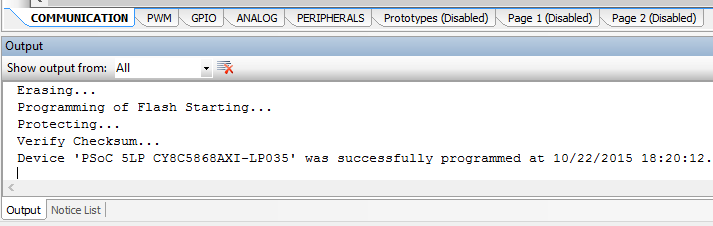
In the Output window on the the bottom you should see confirmation that the device was successfully programmed.
Programming with the Bootloader
All PiSoCs come pre-installed with a USB bootloader and the Python API. Using PSoC Creator’s Bootloader Host Tool you can overwrite the Python API project with your own PSoC Creator project. The USB bootloader will always remain on the board unless you use a Miniprog programmer.
- You’ll need to install our PiSoC Drivers in order to use the bootloader.
- If you just want to edit the Python/Scratch API’s functionality, you can download the project here (includes bootloader).
- If you want to create new PSoC Creator projects, you’ll just need our bootloader.
Here we will go through an example of Bootloading our Bootloadable Template project.
First, flip the switch near the white header on the PiSoC to “Prog”, then plug the PiSoC into the computer via a micro USB cable. Hint – you can flip the switch to the desired mode and then hit the “RST” Reset button to put the PiSoC into program or run mode if the board is already on.
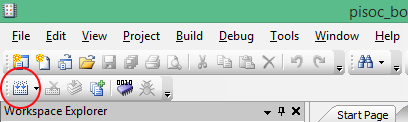
Now you will need to build the project by clicking the “Build” button.
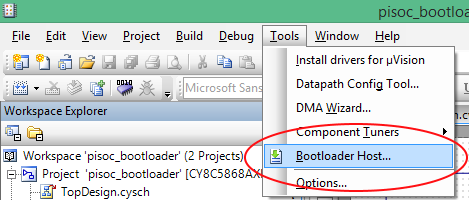
Once the project is done building, go to “Tools” and then “Bootloader Host…”
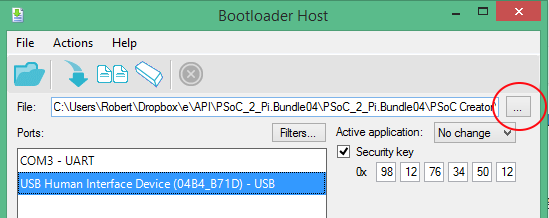
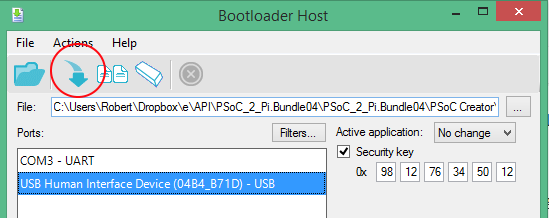
Once in the Bootloader Host window, click the three dots near the top right to select your project file to bootload.
Then navigate to: *project_download_location *\pisoc_bootloadable_template.Bundle04\PSoC Creator\pisoc_bootloadable_template.cydsn\CortexM3\ARM_GCC_484\Debug\pisoc_bootloadable_template.cyacd
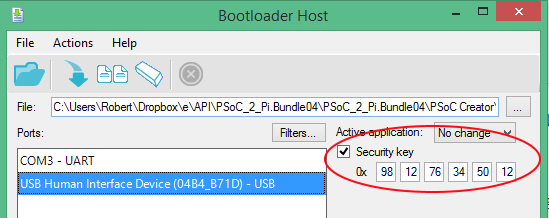
Next you’ll need to input the security key as shown below (98,12,76,34,50,12). The security key is used to prevent you from accidentally trying to bootload using the wrong bootloader.
After that you can hit the “Program” button to bootload the board.
After that you should be all set. You can flip the switch near the white header to “Run” mode before you reset the PiSoC to continue running your program. When you want to program again flip the switch to “Prog” and then hit the “RST” reset button. If you have trouble see below.
Troubleshooting
- The PiSoC fails to bootload
- Check all the settings as shown above. If it still doesn’t work, make sure the device is listed as “USB Human Interface Device” in the Bootload Host Ports menu.
- If you see the the device listed as “PiSoC USB UART” you will need to switch the device to “Prog” mode by flipping the switch to “Prog” mode and then hitting the “RST” Reset button to put the PiSoC into program mode.
- If you don’t see the device at all, make sure your USB cable has the ability to do data transfer. Some cheap cables only do power.
- Check all the settings as shown above. If it still doesn’t work, make sure the device is listed as “USB Human Interface Device” in the Bootload Host Ports menu.
PiSoC Reference
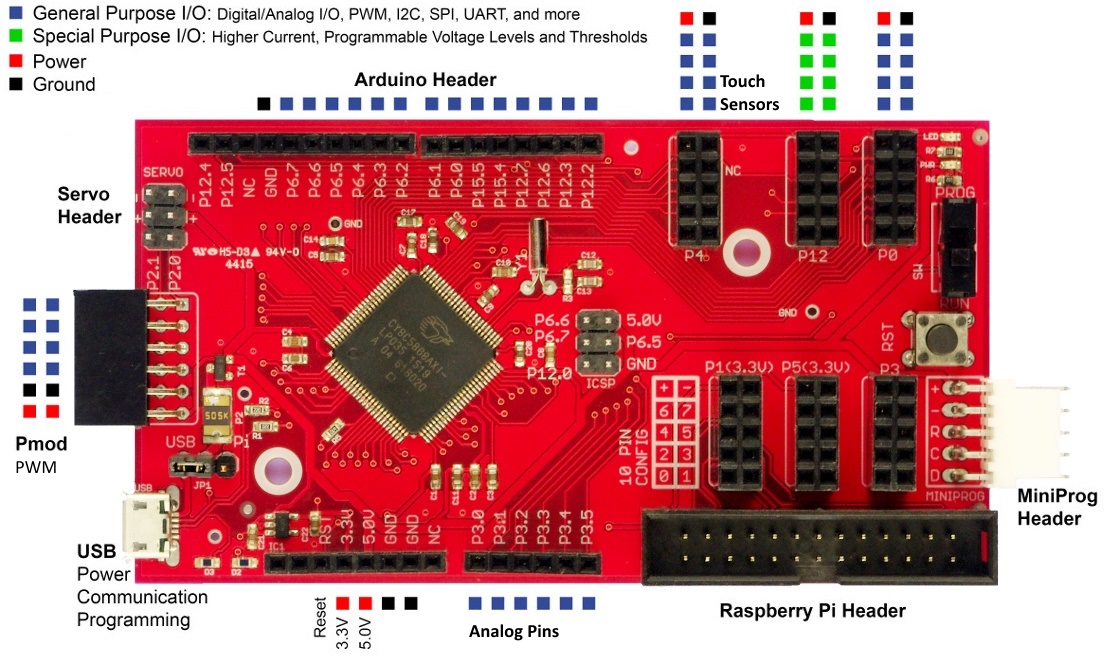
Here you can find more information about the technical aspects of the PiSoC and PiSoC+. Below is the pin out for the Python and Scratch API. If you use PSoC Creator you can configure most of the pins for any function.
There is a controllable LED on P[12]0. The prog/run switch can also be used in your applications, and is on P[15]0. The USB/PI jumper is used to select whether the PiSoC is powered using USB or over the Raspberry Pi header.
PiSoC utilizes Cypress Semiconductor’s PSoC 5LP CY8C5467AXI-LP108 (Datasheet), a programmable system on a chip, which combines a micro controller, programmable analog and digital logic in one chip. It has an ARM Cortex M3 CPU with 128KB of flash. Our board can be used as a standalone microcontroller, a data acquisition/instrumentation device, or in conjunction with the Raspberry Pi or your PC as a hardware accessory. This opens up endless possibilities! Not to mention that PSoC is used in many commercial products, ensuring a reliability most other chips cannot commit to.
PiSoC+ uses the PSoC 5LP CY8C5868AXI-LP035 (Datasheet), which adds more power in the form of a Delta Sigma 20bit ADC, an extra 12bit SAR ADC, two more DACs, and 256KB of Flash. If you don’t know what any of this means, the regular PiSoC already has more features than nearly all other development boards (reconfigurable pins and programmable analog and digital logic!), so you won’t be left wanting.
When you use PSoC Creator, you will have to choose one of the above PSoC 5LP chips in your project. Most projects will be able to compile for either, and it will let you know what resources are available in the Resource Meter.
- To choose your device in PSoC Creator, go to Project->Device Selector. When in the device selector you can narrow down the selection to just PSoC 5 by leaving only ARM CM3 selected in the CPU tab.
- To see what resources you have available to use in your project, go to View->Resource Meter.