Scratch is a visual programming language that lets people of all ages unleash their creativity, no programming experience needed! You simply drag and snap blocks to create your program. With the RPiSoC, physical computing is now thrown into the mix. Controlling LED lights, motors, cameras, touch sensors, and more is now as easy to use as the rest of Scratch! Now you can learn programming and electronics at the same time. Thanks to this latest update, we now support Scratch and Python on Windows, Linux, and the Raspberry Pi. OSX should work, but is currently untested.
So after finally finishing up Scratch 1.4 support, I decided to bring the RPiSoC into the new age of visual programming with Scratch 2.0. Now, because the Rasperry Pi doesn’t have flash support, you can’t use 2.0 on your Pi, but you can use it on your PC! We will continue to support Scratch 1.4 on the Raspberry Pi.
The major difference between our 1.4 and 2.0 interfaces is that in 2.0, we are able to create dedicated RPiSoC blocks, with our own parameter definitions. In 1.4, you had to use the broadcast method to communicate specific commands to a remote sensor connection.
Just to give you a quick glimpse, here is a picture of an example that uses the RPiSoC to draw on an Arduino Neopixels shield
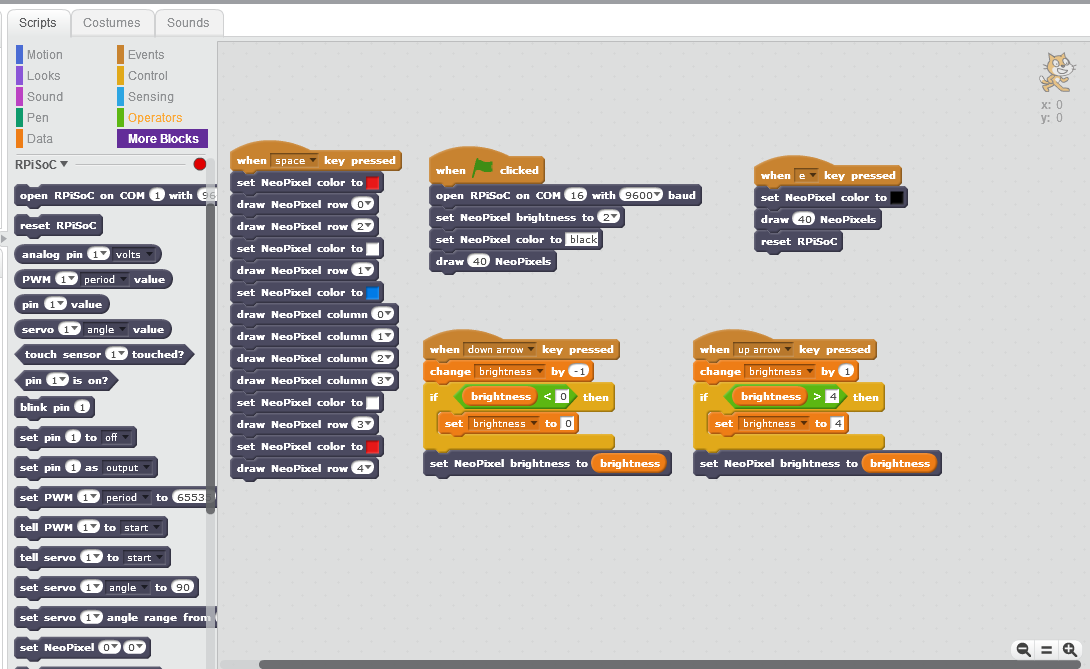
This program will open up communication with the RPiSoC on start, it will clear the screen when ‘e’ is pressed, it will draw an american flag when space is pressed, and it will adjust the brightness when up or down are pressed. Easy enough right? I will be putting together some official documentation on this soon, so you’ll see everything you can do.
But to show you some of the details and how you might use this, lets do an example! We are going to reinvent the wildly popular iOS and Android app Flappy Bird, by leveraging work already done by the massive Scratch community!
First, you will need to have the offline version of Scratch 2.0 installed on your computer, which you can download here.
Now we are going to download the best version of flappy bird I could find. It is a really smooth version created by Scratch user RememberNovember, and you can download it (or just play it) here.
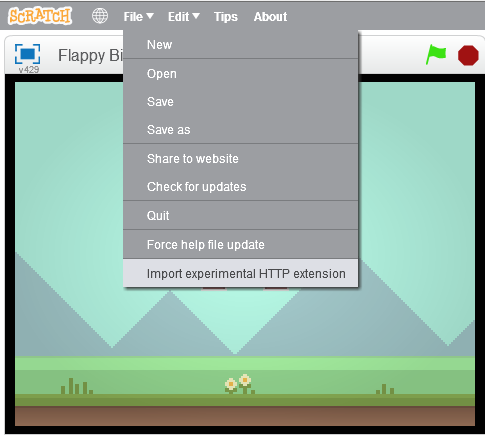
So with that downloaded, I can import the RPiSoC extension to get the tools needed to make some changes. To do this, hold Shift, and click on “File”
You will see an option at the bottom called “import experimental HTTP extension”
You will then add the descriptor file for the helper app, which I will soon have up on the github (once I get everything nice and organized). Once that is imported, you should find some fun new additions to your Scratch toolbox in the “More Blocks” section.
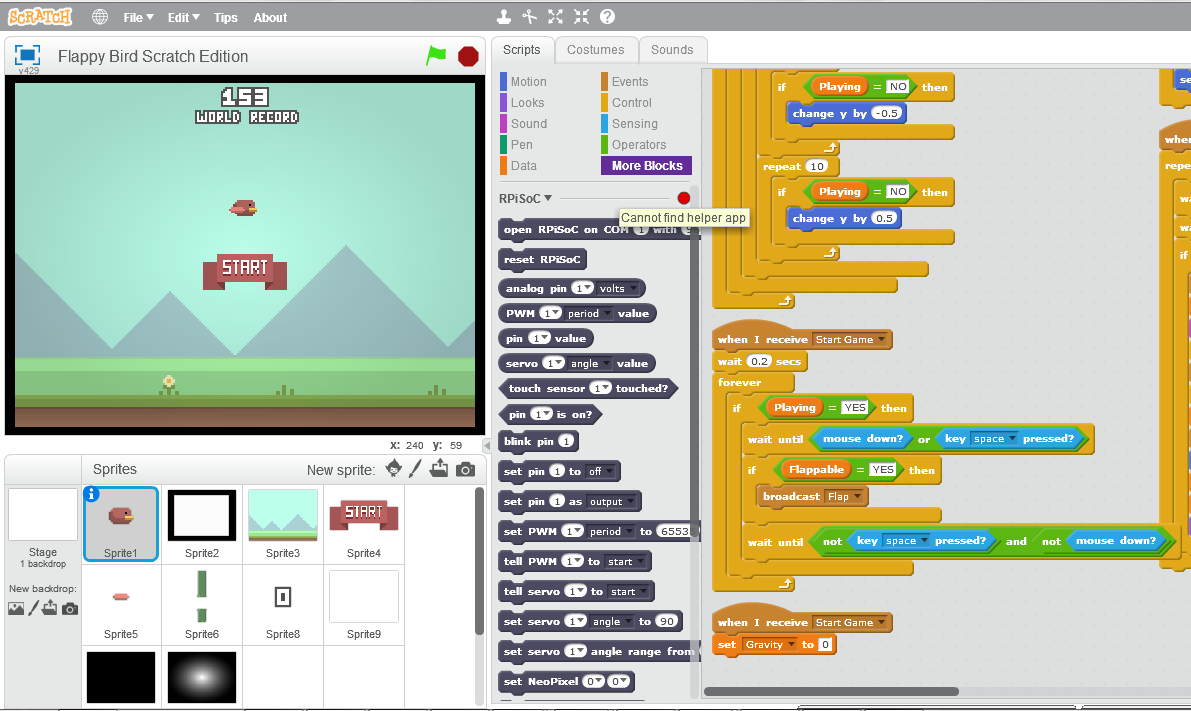
Also notice the red indicator light next to the extension name, which says “cannot find helper app.” This is because we haven’t started the helper app! So lets go ahead and do that. This also will soon be hosted on our github, but I am working on how to most easily deliver it. I’d like to get it to auto launch with the offline editor. For now I have a batch program that I keep on by Desktop that will execute the helper app. So I just have to double click that batch file icon and it starts right up. Which means Scratch should be ready to go (the light will turn green).
So the edit I want to make is to play the game with a banana instead of the space bar. This requires very little editing! Let’s jump to the relevant section, which is in the code for “Sprite 1”, the bird.
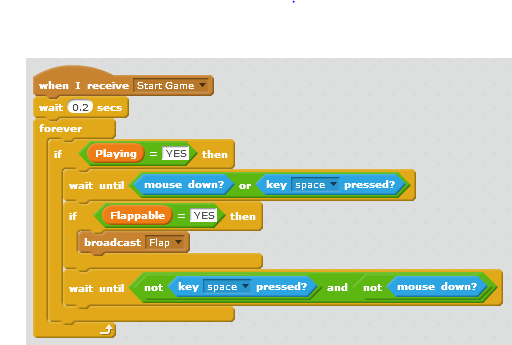
Now we just need to make our changes, and the only modifications needed are:
- Open up the desired COM port when the game is started so we can talk to the RPiSoC
- Change mouse/space key operations to touch sensor operations
This should be easy! The result is the following:
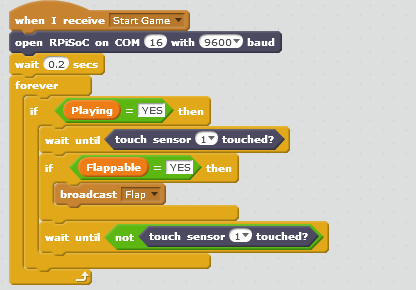
And that is all there is to it! This really does bring a whole new dynamic to the Scratch world. Interested to see what other people are eventually able to make with it. Anyway, time to play some Flappy Bird!